
Recipes
Dubai Chocolate Recipe – How to Make It at Home
This Dubai Chocolate Recipe is easier than most people expect, whether you are following it as a simple bar recipe or adapting it for other treats. The dubai chocolate recipe ingredients are simple, and the steps are straightforward. Most people wonder how is dubai chocolate made at home, and it usually comes down to small details: kataifi that isn’t toasted enough, chocolate that’s too thin, or filling packed in before the shell has properly set. This recipe for dubai chocolate covers all of it. Follow the steps in order and you’ll get a bar that genuinely crunches, tastes of real pistachio, and holds together cleanly when you snap it in half, using a method built around how to make dubai chocolate at home without special training.
Recipe at a Glance
Every step in this Dubai Chocolate Recipe below is written to match these times exactly, so plan your prep accordingly.
Prep Time | Cook Time | Total Time | Makes |
30 mins | 15mins | 50 mins + set | 4–6 bars |
What You Need Equipment
f you are wondering what do you need to make dubai chocolate at home, the honest answer is not much. You don’t need professional chocolatier equipment, but two things are non-negotiable.
A standard chocolate bar mold with deep cavities around 1 inch deep. This gives you the thick shell that makes Dubai chocolate what it is. Cheap shallow molds produce bars that crack when you try to fill them.
For tempering chocolate correctly. You can do it without one, but you risk bars that bloom (develop white streaks) or don’t snap cleanly. A basic instant-read thermometer costs under $10.
Everything else is standard
a medium saucepan, a heatproof bowl, a spatula, and a pastry brush or spoon for coating the mold.
Dubai Chocolate Recipe Ingredients
These are the exact ingredients to make dubai chocolate the traditional way, with easy substitutes noted where it matters
| Ingredient | Amount | Notes / What to Look For |
| Milk or dark chocolate | 400g (14 oz) | Belgian or high-quality. 30–50% cocoa for milk, 60–70% for dark. Avoid compound chocolate. |
| Kataifi pastry (kadayif) | 100g (3.5 oz) | Fresh or frozen. Find at Middle Eastern grocery stores or Amazon. Do not substitute. |
| Unsalted butter | 2 tbsp (30g) | For toasting the kataifi. Salted butter changes the flavor balance. |
| Pistachio paste / cream | 150g (5.3 oz) | 100% ground pistachios. Check the label — no sugar, no oil, no ‘pistachio flavor.’ |
| Tahini | 2 tbsp (30g) | Pure sesame paste. Adds depth. Skip it and the filling tastes flat. |
| Pinch of salt | ¼ tsp | Ties the filling flavors together. Don’t skip. |
| Green food coloring (optional) | 1–2 drops | For visual contrast. White chocolate swirl on top optional too. |
How to Make Dubai Chocolate Step by Step
This is the exact dubai chocolate how to make process we use ourselves, and making dubai chocolate this way rarely goes wrong if you follow the order below. Work through these steps in order. Don’t rush the kataifi toasting and don’t skip the refrigeration between layers both are where most home attempts go wrong.
Temper the Chocolate
Chop your chocolate into small, even pieces and melt two-thirds of it in a heatproof bowl over simmering water, stirring constantly. Heat to 115°F (46°C) for milk chocolate or 120°F (49°C) for dark.
Remove from heat. Stir in the remaining one-third of unmelted chocolate until fully combined and smooth. The temperature should drop to 82–84°F (28–29°C). Gently reheat to 88–90°F (31–32°C). Your chocolate is now tempered.
Toast the Kataifi
While the shell sets, separate the kataifi pastry strands into a loose pile. Melt butter in a skillet over medium heat and add the kataifi.
Toast for 6–8 minutes, stirring constantly, until every strand is deep golden brown and smells nutty. This step is the most important in the whole recipe under-toasted kataifi softens inside the bar within hours and you lose the crunch entirely. It should look darker than you think it needs to be.
Remove from heat. Let it cool completely before mixing hot kataifi will melt the pistachio cream.
Fill the Mold
Take your set chocolate shells out of the fridge. Spoon the pistachio-kataifi filling into each cavity, packing it in firmly with the back of a spoon. Fill to about 3–4mm from the top you need room for the sealing layer.
Do not overfill. If the filling reaches the edge, the bottom seal won’t hold and the bar will crack when you unmold it.
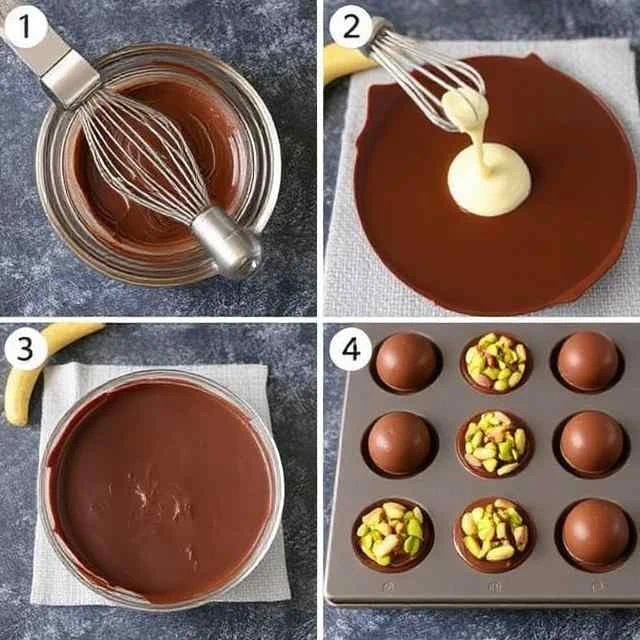
Make the Chocolate Shell
Spoon or brush a generous layer of tempered chocolate into the mold cavities — coat the sides and bottom thoroughly. Aim for a 3–4mm thickness. Too thin and the bar cracks. Too thick and it overpowers the filling.
Tap the mold on the counter a few times to release air bubbles. Place in the fridge for 10 minutes until the shell is fully set and pulls slightly from the mold edges.
Make the Pistachio Filling
In a bowl, mix pistachio paste, tahini, and a pinch of salt until smooth and combined. The tahini loosens the pistachio paste and gives the filling that slightly savory, complex depth.
Add the cooled toasted kataifi and fold it in gently. You want the strands coated in filling but still intact don’t crush them. The filling should feel thick, not runny.
Seal and Set
Pour tempered chocolate over the filling to seal the bottom of each bar. Spread it evenly with a spatula and tap the mold again to level it.
Refrigerate for 20–25 minutes until completely set. The bars are ready when they pull cleanly from the sides of the mold. Unmold by pressing gently from below never force them or the shell cracks.
That is genuinely how is dubai chocolate made at home, from tempering through to the final set. The process stays the same in 2026 as it did when the trend first went viral, only the equipment has gotten more affordable and easier to find.
Tips That Actually Make a Difference
These small adjustments are what separate an average attempt at how to make dubai chocolate bar from one that actually holds together, and they matter just as much for a homemade dubai chocolate bar as they do for a store bought one.
Dubai Chocolate Recipe Variations
Once you can make dubai chocolate confidently using the base method above, these variations are worth trying:
White Chocolate Version
Use white chocolate for the shell. Visually striking against the green filling. The flavor is sweeter overall, balancing it by increasing the tahini to 3 tablespoons.
Dubai Chocolate Bark
Skip the molds entirely. Pour tempered chocolate onto a lined baking sheet, spread the pistachio-kataifi filling across the surface, pour a second layer of chocolate on top, and refrigerate. Break into irregular pieces when set. Faster, simpler, and still delivers the same flavor.
Mini Bars
Use a mini silicone mold to make bite-sized versions. Halve all quantities. Ideal for gifting — they look impressive in a box and the chocolate-to-filling ratio is even better at a smaller scale.
Dubai Chocolate Strawberries Bonus Recipe
Dubai chocolate strawberries use the same pistachio-kataifi filling, applied differently. They’re faster to make and just as popular as the bars.
What You Need
Fresh large strawberries, tempered chocolate, pistachio-kataifi filling (same recipe above), cocktail sticks or skewers.
How to Make Them
Wash and dry strawberries completely, any moisture will cause the chocolate to seize. Dip each strawberry in tempered chocolate, let the excess drip off, and place on parchment.
While still wet, press a small spoonful of the pistachio-kataifi filling onto the top of each strawberry. Let sit at room temperature for 15 minutes.
For a cleaner finish
let the first chocolate layer set, then add a second chocolate coat and top with filling immediately. This gives you that defined chocolate layer between the strawberry and the filling.
Bottom Line
This Dubai Chocolate Recipe covers everything from the classic bar to strawberries, brownies, cookies, and cups. In the end, what do you need to make dubai chocolate really comes down to good ingredients to make dubai chocolate and a little patience. A homemade dubai chocolate bar made with real pistachio paste and properly toasted kataifi will always taste better than a shortcut version, and it usually costs less than buying one ready made.